In today's digital age, cloud storage has become an indispensable part of our daily lives and work routines. Platforms like OneDrive and Google Drive, both immensely popular, offer users convenient options for data storage and access.
However, there are occasions when we find the need to migrate data from one cloud storage platform to another, either to meet different requirements or to enhance collaborative environments. The desire to use Google Drive as an alternative to OneDrive is a common one, making it crucial to understand how to efficiently copy OneDrive files to Google Drive.
In this article, we will introduce four free methods that allow you to effortlessly transfer files from OneDrive to Google Drive.
Method 1: Manual Migration
Exporting Data from OneDrive
-
Log in to your OneDrive account in the browser.
-
Select the files and folders you want to transfer.
-
Click on the download option.

-
Choose a destination on your local device to save the downloaded data.
Upload the downloaded data to Google Drive
-
Log in to your Google Drive account in the browser.
-
Upload the downloaded files or folders from your local device to Google Drive.
Note: When you download multiple files or folders at once, Microsoft will place them in a zip archive. If you want to preserve the folder structure from your OneDrive account in Google Drive, you will need to unzip the files first before uploading them to Google Drive.
Advantages of Manual Copying
Cost: WIt is a cost-effective option as it doesn't require the use of paid migration tools or professional services.
Disadvantages of Manual Copying
-
Time-Consuming: Manual copying can be time-consuming, especially if you have a large volume of data to transfer. It may not be the most efficient method for extensive data migration.
-
Human Error: During the manual copying process, there is a higher risk of human errors, such as accidentally skipping files or encountering network errors due to network interruptions.
-
Limited Automation: Manual copying lacks the automation and scheduling capabilities that other methods, like using migration tools or scripts, offer. This means you need to be actively involved throughout the transfer.
Method 2: Transfer OneDrive to Google Drive with Windows Explorer
-
Install the OneDrive and Google Drive desktop applications, and log in to the accounts.
-
In Windows Explorer, open the OneDrive and Google Drive folders side by side.
-
In OneDrive, locate the files or folders you want to copy or move.
-
Navigate to the Google Drive folder, Drag and drop your files from OneDrive folders to Google Drive.

Advantages
Automatic Sync: If you're already using both applications to sync files, you can take full advantage of their automatic sync feature. This means that once you copy files from OneDrive to the Google Drive folder, they will automatically sync to the cloud, eliminating the need for manual intervention.
Disadvantages
-
Occupying Local Storage Space: Using two desktop applications to sync the same files can consume local storage space on your computer, especially if you have a large number of files to copy.
-
Network Usage: The automatic sync process requires a network connection and can consume bandwidth. This may impact your internet connection during large file transfers.
-
Dependency on Two Applications: Copying files relies on two different applications, meaning you need to ensure that both applications are functioning correctly and syncing properly. Additionally, this method is only available on Windows systems; other platforms require different methods.
-
Lack of Incremental Transfer Support: It doesn't support syncing newly added files automatically. You can only manually select files or folders for transfer each time. If you require incremental transfers, this method may not be suitable.
Method 3: Transfer OneDrive to Google Drive with RiceDrive (Recommended)
RiceDrive is a cloud-based online service designed to assist users in managing and transferring files and data between multiple different cloud storage accounts. Transferring files from OneDrive to Google Drive using RiceDrive is a straightforward and efficient process.
Below, we will guide you through the process of transferring your files from OneDrive to Google Drive without downloading seamlessly using RiceDrive. Additionally, at the end of the article, we have included a YouTube video tutorial for RiceDrive.
-
Sign Up for RiceDrive
Visit the RiceDrive website at www.ricedrive.com/login.
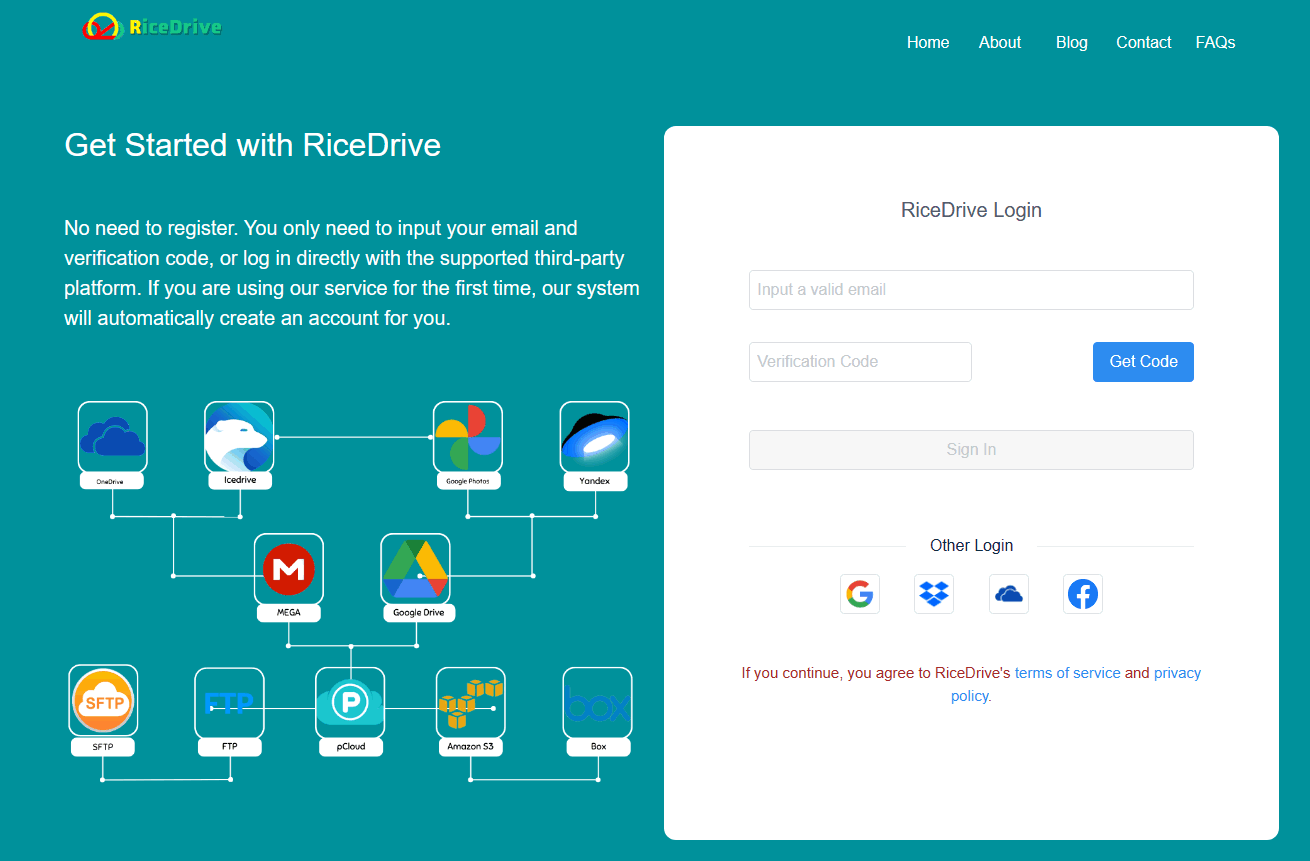
In the email input box, after entering your email, you will receive a verification code to log in.
-
Add OneDrive and Google Drive Accounts
In the RiceDrive user interface, click on the "Link Storage" option in the left sidebar.

Select "OneDrive" and "Google Drive" from the list of supported cloud storage services.
Follow the prompts to authorize RiceDrive to access your OneDrive and Google Drive accounts.
-
Create a transfer task
both OneDrive and Google Drive are added to your RiceDrive account, you can Create a transfer task.
In the left sidebar, click on "Transfer & Download," and then click the "Create Transfer" button in the upper right corner.
the transfer page, choose the source cloud (OneDrive) and the destination cloud (Google Drive). Select the files or folders you want to transfer.

Click the "start up" button to start the transfer process. RiceDrive will initiate the migration of your files. This process may take some time, depending on the number and size of the files. You can track the migration progress in RiceDrive's task list.
-
Verify the Transfer
After the transfer is completed, you can check the transfer logs in RiceDrive or log in to your Google Drive account to ensure that all your files have been successfully transferred from OneDrive.
Advantages of RiceDrive migration
-
Efficiency: RiceDrive streamlines the migration process, making it faster and less labor-intensive compared to manual migration.
-
User-Friendly: RiceDrive provides a user-friendly interface that simplifies the migration process, making it accessible to a broader range of users.
-
Incremental Transfer: RiceDrive will compare the source and target directories and only transfer files that are newly added or modified in the source directory.
-
Scheduled Transfers: You can schedule transfers at convenient times, reducing the need for constant manual supervision.
-
Cross-Platform Support: RiceDrive supports migration between various cloud storage platforms, making it versatile for users with diverse storage needs.
-
Save Time and Bandwidth: RiceDrive transfers in the server's background, does not consume local bandwidth, and only transfers newly added or modified files. This allows you to save a significant amount of time and internet bandwidth resources, especially in the case of large folders or file collections.
Disadvantages of RiceDrive migration
Costs: While RiceDrive offers a free plan with limitations, more extensive migration needs may require a paid subscription, which adds to the overall cost.
Method 4: Sync OneDrive to Google Drive with Rclone
Rclone is an open source, free command line tool that is used to sync and transfer files between different cloud storage services. It has many capabilities including file transfer, backups, remote storage mounting, etc. and is compatible with common cloud services like Google Drive, OneDrive, Dropbox, Amazon S3, etc. Below shows how to use Rclone on Windows to migrate photos from Google Photos to OneDrive.
-
Download the Rclone command line program from the official website: https://rclone.org/downloads/. Unzip it to your local disk after downloading.

-
Download Rclone Browser software
It is an open source GUI (Graphical User Interface) tool built on top of Rclone for managing and operating multiple cloud storage services. It enables easy management and syncing of data across cloud storage. Please click here for the download link.

After successfully downloading, install it on your Windows system.
-
Configure Rclone Browser
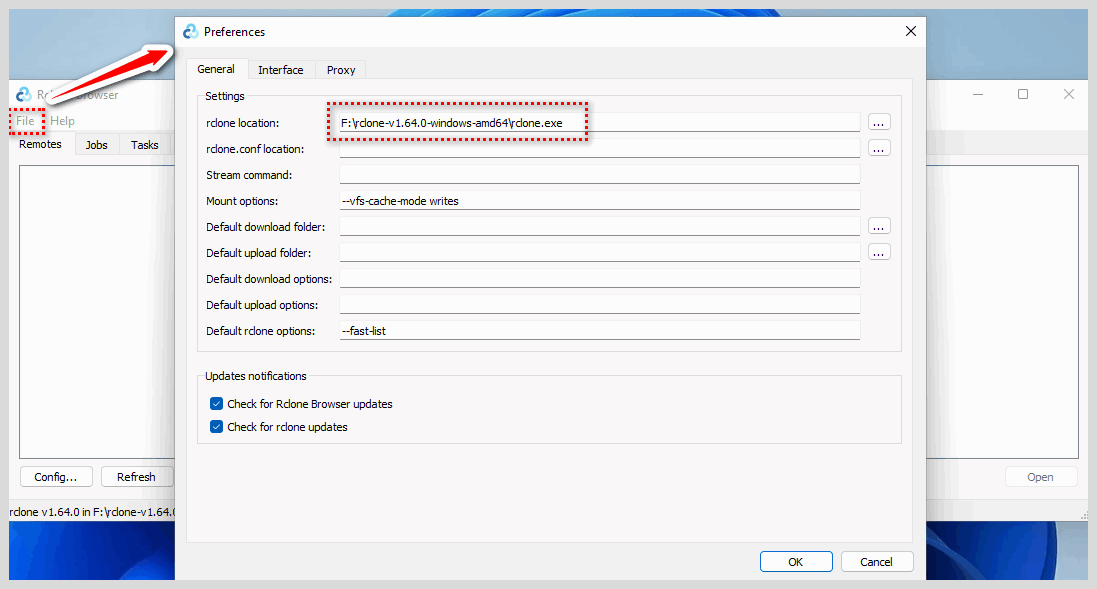
Run the installed Rclone Browser and open the Rclone Browser configuration interface (file->preferences). In the rclone location textbox, click the 3 dot button on the right and browse to the uncompressed rclone.exe program, then click ok button to save.
-
Configure OneDrive in Rclone Browser
Click the Config button at the bottom of Remote page to open the rclone command line window.

In the cmd, type "n" and press enter to create a new config. Then assign a name to the config, here I will call it "OneDrive", and press enter to confirm.

Next select the config type, here we choose the OneDrive type, the onedrive number is 31, we enter 31 and press enter.

Then for client_id and client_secret we simply press enter to skip them.

For the region we select 1, then in step 7 press enter to skip default.

In step 8 press enter for default and it will automatically open the browser to start the OneDrive authorization process. Login to your OneDrive account on the web page and click Agree.
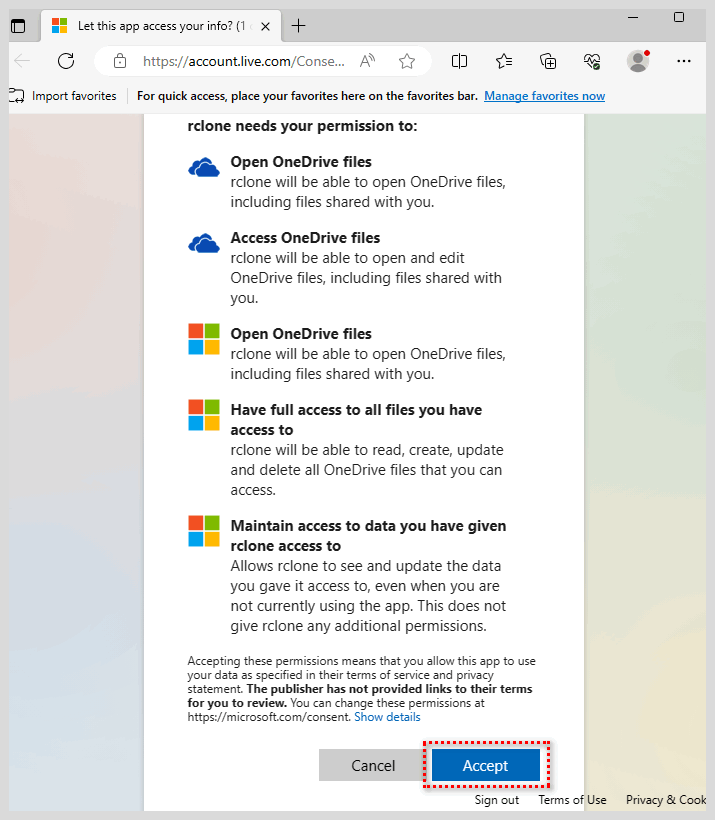
Note that if browser doesn't open automatically, you need to manually copy the URL in cmd and paste it in browser to open it.

In step 9 we enter 1, in steps 10 and 11 press enter to skip, and OneDrive is configured.

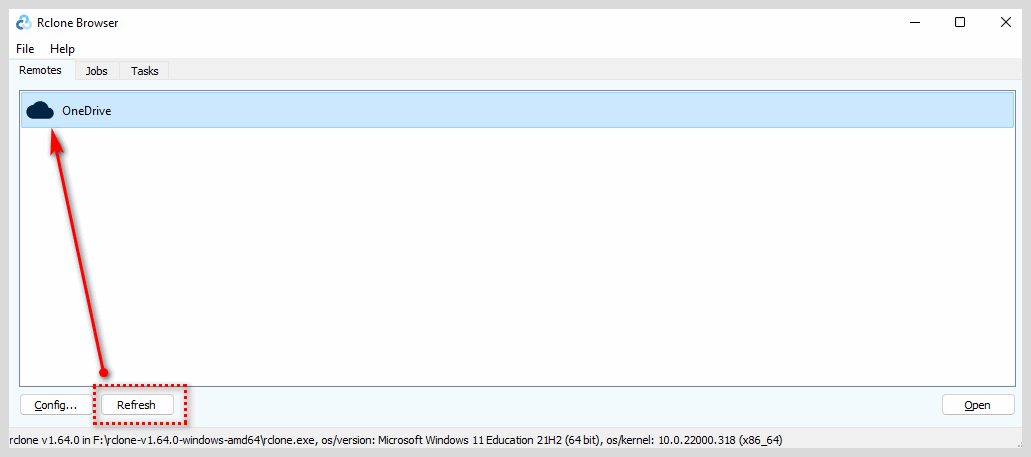
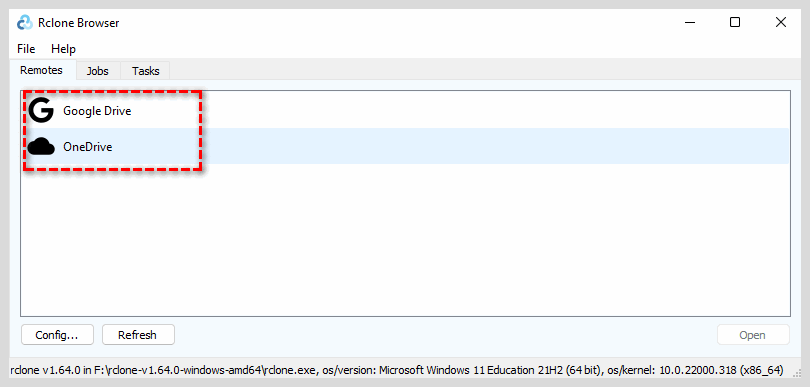
Go back to Rclone Browser interface, click the Refresh button and you should see the OneDrive storage configured successfully.
-
Configure Google Drive in Rclone Browser
The process of configuring Google Drive and configuring OneDrive is fundamentally similar, but you need to be careful when choosing the cloud storage type to avoid mistakes.

When authorizing in the browser section, you need to click the 'Allow' button to grant rclone access to your Google account.
When Google Drive is configured, you can click the refresh button in Rclone Browser to view it.
-
Create a OneDrive to Google Drive transfer task in Rclone Browser
In the Remotes interface, double click OneDrive to open it. Once inside OneDrive, right click the folder you want to transfer then press the download button.

In the destination path input box, enter the folder path in Google Drive, in the format Google Drive:onedrive. Here I'm entering the "onedrive" folder in OneDrive. Then enter a task description and click the "Save Task" button to facilitate incremental transfer next time.

Go into the task interface and click the "Run" button to start the task.

In the jobs page, the task execution starts and then wait for the task to complete successfully.

Advantages
-
Cost Savings with Open Source rclone: rclone is an open source tool that can be used for free without licensing costs, which is very beneficial for saving costs.
-
Versatile Compatibility for Cross-Platform Cloud Transfers: rclone can run on multiple operating systems including Windows, macOS and various Linux distributions, so it has wide applicability. rclone is compatible with multiple cloud storage platforms including Google Drive, Dropbox, Amazon S3, Microsoft OneDrive etc., meaning it can conveniently transfer data between different cloud storages.
Disadvantages
-
Complexity for Novice Users: For users not familiar with command line tools, rclone can seem complex. The setup and operation may require some learning and technical knowledge.
-
Performance Constraints Due to Internet and Provider Limitations: Performance can be limited by internet connection speed and cloud storage provider limitations since data transfer happens over the internet.
Conclusion
As you embark on the journey of transferring your OneDrive files to Google Drive in 2023, consider the four methods outlined in this article. Each method offers unique advantages and considerations, allowing you to make an informed choice that aligns with your specific needs and preferences. Efficiency and accuracy are key when migrating your valuable data, so choose the method that suits your requirements and ensures a smooth transition to Google Drive.
